In the realm of web security, the integrity of HTTP Authentication stands as a fundamental pillar safeguarding sensitive data and resources. As digital landscapes continue to evolve, understanding the nuances of authentication mechanisms becomes paramount in fortifying defenses against potential threats. This article delves into the multifaceted landscape of HTTP Authentication, illuminating its intricacies, vulnerabilities, and the myriad strategies employed in its exploitation.
We explore the pivotal role of secure authentication protocols in preserving confidentiality, integrity, and accessibility within web environments. By delineating the significance of robust authentication mechanisms, we aim to underscore the necessity for vigilance and proactive measures in the face of emerging cyber threats.
We embark on a journey to dissect HTTP Authentication comprehensively, equipping readers with insights to navigate its complexities and fortify their digital fortresses against malicious incursions. Through empirical exploration and strategic discourse, we endeavor to empower security practitioners, developers, and stakeholders with actionable knowledge to bolster the resilience of their digital infrastructures.
Understanding HTTP Authentication

Authentication within the realm of HTTP serves as a pivotal access control mechanism, wherein the identity of a client is validated to authorize their access to specific web resources. In essence, authentication functions as a critical security layer in the landscape of HTTP communications, ensuring that only authorized entities are granted entry to sensitive information or functionalities.
At the onset of a client’s interaction with a web server, their initial request typically arrives devoid of any identifying information, rendering it anonymous. This anonymity poses inherent risks, particularly when dealing with sensitive resources such as financial data, where unrestricted access could lead to dire consequences. Herein lies the essence of authentication: upon receiving an anonymous request for access to a protected resource, the server promptly denies entry and signals the necessity for client authentication.
The exchange of authentication information between the server and the client occurs through specialized headers, facilitating the verification of the client’s identity before granting access to the requested resource. While the foundational principles of authentication elucidate its necessity and overarching purpose, the complexity of authentication mechanisms varies significantly depending on the nature of the resources being accessed.
As we delve deeper into the intricacies of authentication schemes, it becomes evident that different types of resources necessitate tailored authentication approaches, each characterized by its unique protocols, encryption methods, and validation mechanisms. Thus, understanding the diverse spectrum of authentication schemes is paramount in navigating the multifaceted landscape of web security and ensuring the integrity and confidentiality of digital assets.
How Does HTTP Authentication Work?

HTTP Authentication operates on a challenge-response mechanism, wherein the server prompts the client to provide authentication credentials in response to a request for accessing protected resources. The process unfolds in several sequential steps, each designed to verify the identity of the client before granting access. Below is a simplified overview of how HTTP Authentication works:
- Client Request: When a client attempts to access a protected resource on a web server, it sends an HTTP request to the server. This initial request typically lacks authentication credentials, rendering it anonymous.
- Server Challenge: Upon receiving the client’s request for access to a protected resource, the server recognizes the absence of authentication credentials and responds with a 401 Unauthorized status code. Along with this status code, the server issues a challenge, indicating that authentication is required to proceed further.
- Client Authentication: In response to the server’s challenge, the client provides authentication credentials, which may include a username and password, an authentication token, or other authentication data, depending on the chosen authentication scheme.
- Authentication Verification: The server receives the authentication credentials submitted by the client and validates them against its authentication database or authentication provider. If the credentials are successfully authenticated, the server grants access to the requested resource by sending a 200 OK status code along with the requested content. However, if the authentication fails, the server sends a new 401 Unauthorized status code, prompting the client to retry authentication with valid credentials.
- Access Granted or Denied: Upon successful authentication, the client gains access to the protected resource and can proceed with the requested operation, such as viewing a webpage or accessing an API endpoint. Conversely, if authentication fails after multiple attempts or due to invalid credentials, access to the resource is denied, and the client receives an appropriate error response.
- Session Management (Optional): In some cases, HTTP Authentication may involve session management to maintain authenticated sessions between the client and the server. This typically involves issuing session tokens or cookies to authenticated clients, which are then used to validate subsequent requests without requiring reauthentication for each interaction.
Common Vulnerabilities in HTTP Authentication:
HTTP Authentication, while serving as a crucial security measure, is susceptible to various vulnerabilities that can be exploited by malicious actors to gain unauthorized access to protected resources. Understanding these vulnerabilities is essential for implementing effective security measures and mitigating potential risks. Below are some common vulnerabilities associated with HTTP Authentication:
Brute Force Attacks:
- Brute force attacks involve systematically trying every possible combination of usernames and passwords until the correct credentials are discovered.
- Attackers leverage automated tools to launch brute force attacks against HTTP Authentication mechanisms, exploiting weak or easily guessable credentials.
- Implementing strong password policies and rate-limiting login attempts can help mitigate the risk of brute force attacks.
Credential Stuffing:
- Credential stuffing occurs when attackers use username and password pairs obtained from previous data breaches to gain unauthorized access to other accounts.
- Attackers exploit users who reuse the same credentials across multiple online services, leveraging compromised credentials to infiltrate HTTP Authentication systems.
- Encouraging users to use unique, complex passwords and implementing multi-factor authentication (MFA) can help prevent credential stuffing attacks.
Session Fixation:
- Session fixation attacks target the authentication process by manipulating session identifiers to hijack user sessions.
- Attackers may exploit vulnerabilities in session management mechanisms to fixate session identifiers on a known value, allowing them to impersonate authenticated users.
- Implementing secure session management practices, such as generating random session identifiers and regenerating session identifiers upon authentication, can mitigate the risk of session fixation attacks.
Man-in-the-Middle (MITM) Attacks:
- MITM attacks involve intercepting and manipulating communication between the client and the server to eavesdrop on or modify authentication data.
- Attackers may exploit vulnerabilities in network protocols or compromise intermediary systems to intercept and tamper with authentication requests and responses.
- Implementing Transport Layer Security (TLS) to encrypt communication between the client and the server can protect against MITM attacks by ensuring the confidentiality and integrity of authentication data.
Setup Password Authentication
Setting up Password Authentication involves configuring a web server to require users to provide a username and password before accessing protected resources. Here’s a general overview of the steps involved in setting up Password Authentication, particularly using Apache web server:
Installing the Apache utility Package
To install the Apache utility package, you typically need to install the Apache HTTP Server along with any necessary utilities for managing and configuring it. Here are the steps to install the Apache utility package on a Debian-based system, such as Ubuntu:
- Update Package Lists:Before installing any new packages, it’s a good practice to update the package lists to ensure you’re installing the latest versions available in the repositories. Open a terminal and run:
sudo apt update
- Install Apache HTTP Server:Apache HTTP Server is available in the default repositories of most Debian-based distributions. To install it, run:
sudo apt install apache2
- Verify Installation:Once the installation is complete, you can verify that Apache HTTP Server is installed and running by checking its status. Run:
sudo systemctl status apache2
If Apache is running, you should see an active (running) status indication.
- Optional: Install Additional Apache Utilities:Depending on your needs, you may want to install additional Apache utilities for managing configurations, certificates, and more. Here are some common utilities you might consider:
- apache2-utils: Provides additional utilities like htpasswd for managing user authentication.
- ssl-cert: Installs a simple utility to create SSL certificates. Useful if you plan to enable HTTPS on your server. To install these utilities, run:
sudo apt install apache2-utils ssl-cert
- Confirm Installation:After installing the Apache utility package and any additional utilities, you can confirm the installation by checking the installed versions. For example, you can check the Apache version with:
apache2 -v
And you can verify the installation of htpasswd by running:
htpasswd -v
By following these steps, you can install the Apache utility package, including the Apache HTTP Server and any necessary additional utilities, on your Debian-based system. Adjustments may be needed based on your specific distribution or requirements.
Creating the Password File
Creating the password file involves using the htpasswd utility provided by Apache to generate and manage user credentials for HTTP Authentication. Here’s how you can create a password file:
- Open a Terminal:First, open a terminal or command prompt on your system where you have administrative privileges.
- Use the htpasswd Utility:The htpasswd utility allows you to create and manage user authentication credentials. The basic syntax for creating a new password file and adding a user to it is as follows:
htpasswd -c /path/to/password/file username
Replace /path/to/password/file with the path where you want to store the password file, and username with the desired username.
- Enter Password:After executing the command, you will be prompted to enter and confirm the password for the specified username. The password will be securely hashed and stored in the password file.
- Confirm Creation:Once you’ve entered the password and confirmed it, the password file will be created, and the user’s credentials will be added to it. You should see a confirmation message indicating that the password file has been successfully created.
- Additional Users (Optional):If you need to add more users to the password file, you can use the htpasswd command without the -c option (which is used only for creating a new file). For example:
htpasswd /path/to/password/file another_username
You will be prompted to enter and confirm the password for the new user, and their credentials will be added to the existing password file.
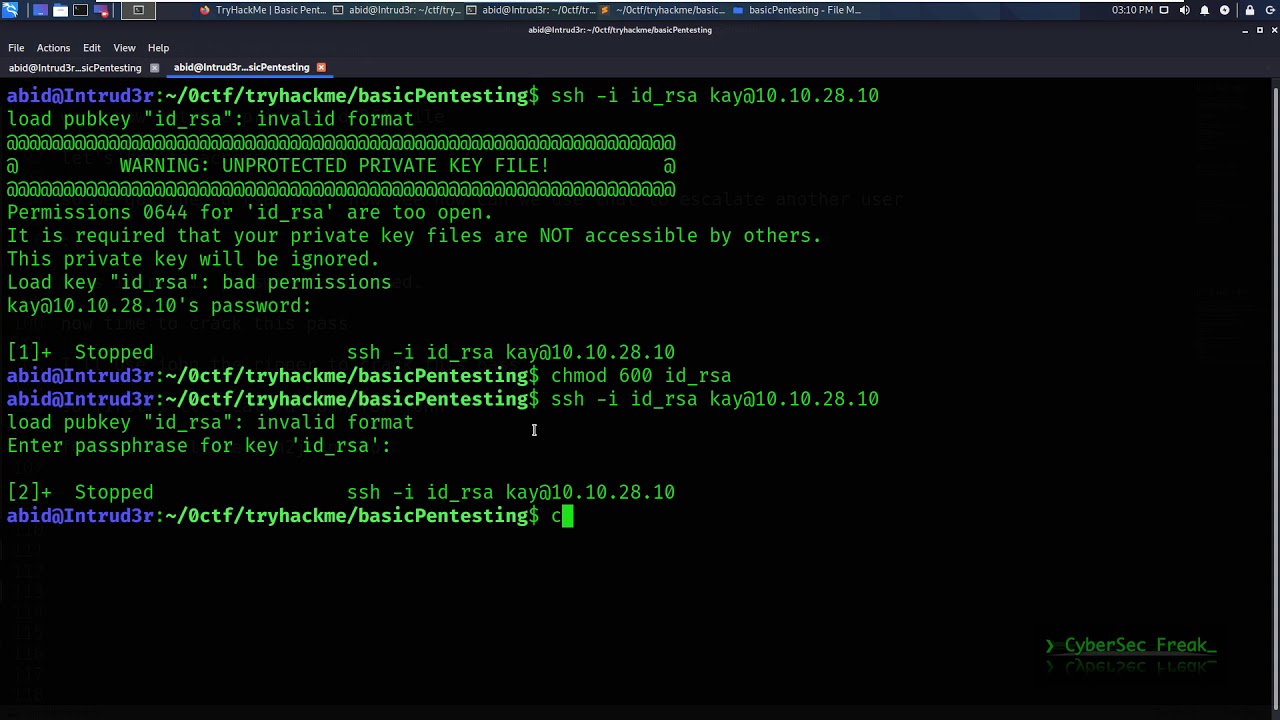
- Secure Permissions (Optional):For security reasons, you may want to ensure that the password file is not accessible by unauthorized users. You can set appropriate permissions on the file using the chmod command, restricting access to the owner and possibly the group:
chmod 640 /path/to/password/file
By following these steps, you can create a password file using the htpasswd utility, which is essential for implementing Password Authentication on your Apache web server. Make sure to securely manage and store the password file to prevent unauthorized access to user credentials.
Configuring Access Control inside the Virtual Host Definition
Configuring access control inside the virtual host definition involves specifying the authentication requirements and access restrictions for specific directories or resources within your Apache web server’s virtual host configuration. Here’s how you can do it:
- Locate the Virtual Host Configuration File:Navigate to the directory where your Apache virtual host configuration files are stored. Typically, these files are located in /etc/apache2/sites-available/ on Debian-based systems.
- Open the Virtual Host Configuration File:Identify the virtual host configuration file corresponding to the website or application you want to protect with Password Authentication. Open this file in a text editor with administrative privileges.
- Define Access Control Directives:Within the <VirtualHost> block for your website, add directives to specify the authentication requirements and access control rules. Here’s an example of how to configure basic authentication:
<VirtualHost *:80> ServerName example.com DocumentRoot /var/www/html <Directory /var/www/html/protected> AuthType Basic AuthName “Restricted Area” AuthUserFile /path/to/password/file Require valid-user </Directory> </VirtualHost>
Replace example.com with your domain, /var/www/html/protected with the path to the directory or location you want to protect, and /path/to/password/file with the path to your password file created earlier.
- Explanation of Directives:
- AuthType: Specifies the type of authentication to use. In this case, it’s set to Basic, indicating Basic Authentication.
- AuthName: Defines the authentication realm, which is displayed to users when prompted for credentials.
- AuthUserFile: Specifies the path to the password file containing user credentials.
- Require valid-user: Specifies that any user listed in the password file is allowed access. Alternatively, you can specify specific usernames or groups here.
- Save and Close the Configuration File:After making the necessary changes, save the configuration file and close the text editor.
- Restart Apache:To apply the changes, restart the Apache web server:
sudo systemctl restart apache2
By configuring access control directives inside the virtual host definition, you can enforce Password Authentication for specific directories or resources within your Apache web server, enhancing security and controlling user access. Adjustments may be needed based on your specific requirements and environment.
Configuring Access Control with .htaccess Files
Configuring access control with .htaccess files allows you to enforce authentication and access restrictions at the directory level without directly modifying the main Apache configuration file. Here’s how you can configure access control using .htaccess files:
- Create or Locate the .htaccess File:Navigate to the directory where you want to enforce access control using .htaccess files. If an .htaccess file does not already exist in that directory, you can create one.
- Open or Create the .htaccess File:Open the .htaccess file in a text editor with administrative privileges.
- Add Access Control Directives:Within the .htaccess file, add directives to specify the authentication requirements and access control rules. Here’s an example of how to configure basic authentication:
AuthType Basic AuthName “Restricted Area” AuthUserFile /path/to/password/file Require valid-user
Replace /path/to/password/file with the path to your password file created earlier.
- Explanation of Directives:
- AuthType: Specifies the type of authentication to use. In this case, it’s set to Basic, indicating Basic Authentication.
- AuthName: Defines the authentication realm, which is displayed to users when prompted for credentials.
- AuthUserFile: Specifies the path to the password file containing user credentials.
- Require valid-user: Specifies that any user listed in the password file is allowed access. Alternatively, you can specify specific usernames or groups here.
- Save and Close the .htaccess File:After adding the access control directives, save the .htaccess file and close the text editor.
- Secure Permissions (Optional):For security reasons, you may want to ensure that the .htaccess file is not accessible by unauthorized users. Set appropriate permissions on the file using the chmod command:
chmod 644 .htaccess
- Testing:Test the configuration by accessing the directory in a web browser. You should be prompted to enter the username and password configured in the password file. Upon successful authentication, you should be granted access to the protected resources.
By configuring access control with .htaccess files, you can enforce Password Authentication for specific directories or resources within your Apache web server, providing granular control over access permissions. Remember to adjust the configuration as needed based on your specific requirements and environment.
Confirming the Password Authentication
Confirming password authentication involves testing the configured setup to ensure that users are prompted for credentials and granted access only upon successful authentication. To verify the effectiveness of the password authentication, one can simply attempt to access the protected resource through a web browser or HTTP client.
After configuring password authentication using either the virtual host definition or .htaccess file, navigate to the protected directory or resource in a web browser. Upon accessing the protected resource, the browser should prompt you to enter a username and password. Enter the credentials of a user that exists in the password file created earlier. If the credentials are correct, you should be granted access to the resource. Conversely, if the credentials are incorrect or if authentication fails, the browser will display an authentication error message, and access to the resource will be denied.
Additionally, you can verify password authentication by attempting to access the protected resource programmatically using an HTTP client such as cURL or Postman. Send an HTTP request to the protected URL and include the appropriate authentication headers with the username and password. If the authentication is successful, the server will respond with the requested resource. If authentication fails, the server will respond with a 401 Unauthorized status code.
Exploiting HTTP Authentication
Exploiting HTTP Authentication involves various techniques and tools utilized by malicious actors to bypass or compromise authentication mechanisms, leading to unauthorized access to protected resources.Here’s an overview of some common techniques and tools used in exploiting HTTP Authentication:
xHydra
xHydra is a powerful tool commonly utilized for conducting rapid dictionary attacks against various protocols, making it a go-to choice for attackers seeking to compromise authentication systems. Its versatility allows it to target over 50 protocols, including telnet, FTP, HTTP, HTTPS, SMB, and numerous databases, among others.
When using xHydra, selecting an appropriate wordlist is crucial, as it forms the foundation of the dictionary attack. Fortunately, Kali Linux, a popular penetration testing distribution, comes equipped with an array of built-in wordlists, facilitating the selection process.
To initiate a dictionary attack using xHydra, the following command syntax is typically employed:
hydra -L user.txt -P pass.txt 192.168.0.1 http-get
In this command:
- -L specifies the path to the file containing the list of usernames.
- -P specifies the path to the file containing the list of passwords.
- 192.168.0.1 represents the target IP address or hostname.
- http-get indicates the HTTP protocol and the method to be used for the attack.
Upon execution of the command, xHydra commences the dictionary attack, systematically testing each combination of usernames and passwords against the target HTTP authentication system. Through this process, valid credentials are identified, granting unauthorized access to the protected resource.
As a demonstration, consider a scenario where xHydra successfully identifies the username as “raj” and the password as “123” for the HTTP authentication system. This outcome underscores the efficacy of xHydra in swiftly compromising authentication mechanisms, underscoring the importance of robust password policies and vigilant security practices to mitigate such attacks.
Burp Suite
Burp Suite serves as a versatile tool for intercepting and analyzing HTTP requests, making it a valuable asset for security professionals and attackers alike. By intercepting requests, attackers can manipulate authentication data to bypass security measures and gain unauthorized access to protected resources.
To demonstrate the exploitation of HTTP authentication using Burp Suite, start by turning on the Burp Suite and selecting the “Proxy” tab. Ensure that the intercept is turned on to capture the request sent to the server.
Before sending the request to the server, input a random value for authentication. Once the request is captured by Burp Suite, navigate to the Proxy tab and intercept the request. In the intercepted request, you’ll notice information about the type of authentication provided, which in this case is highlighted as “basic”.
To generate the base64 encoded value for authentication within Burp Suite, proceed to the “Action” tab and select “Send to Intruder” for an HTTP Fuzzing attack. In the Intruder frame, configure the position where the payload will be inserted into the request. Select “the encoded value of authentication” for the payload position.
Load a dictionary containing username and password combinations as payload options. Then, encode the payload using base64 encoding to generate the encoded value for authentication.
Initiate a brute force attack to match the encoded value with the payload from the dictionary. Upon finding a matching value, observe the status and length of the response, indicating a successful authentication bypass.
Alternatively, copy the encoded authentication value and replace it with the intercepted authorization value in the request. Forward the modified request to access the restricted content successfully.
Metasploit
To demonstrate the exploitation of HTTP authentication using Metasploit, you can use the auxiliary/scanner/http/http_login module. This module attempts to authenticate against HTTP services using provided credentials. Here’s how you can use Metasploit in the terminal to perform this action:
- Open a terminal window and launch Metasploit by typing:
msfconsole
- Once Metasploit has initialized, load the http_login module by typing:
use auxiliary/scanner/http/http_login
- Set the options for the module. You’ll need to specify the target URL, username, password, and other relevant parameters. For example:
set RHOSTS <target_IP_or_domain> set USERNAME <username> set PASSWORD <password> set THREADS <number_of_threads>
- After setting the options, run the module by typing:
run
- Metasploit will now attempt to authenticate using the provided credentials against the target HTTP service. If successful, it will display the login credentials in the terminal.
Here’s a summarized version of the terminal commands:
msfconsole use auxiliary/scanner/http/http_login set RHOSTS <target_IP_or_domain> set USERNAME <username> set PASSWORD <password> set THREADS <number_of_threads> run
Hydra
To utilize Hydra for conducting a dictionary attack against HTTP authentication, follow these steps:
- Open a Terminal: Begin by opening a terminal window on your system.
- Run Hydra Command: Use the hydra command to initiate the dictionary attack against the target HTTP authentication. Below is an example command syntax:
hydra -l <username_list_file> -p <password_list_file> <target_IP_or_domain> http-get
Replace the placeholders with the appropriate values:
- <username_list_file>: Path to the file containing a list of usernames.
- <password_list_file>: Path to the file containing a list of passwords.
- <target_IP_or_domain>: IP address or domain of the target HTTP service. For example:
hydra -L usernames.txt -P passwords.txt 192.168.0.105 http-get
- Initiate the Attack: After entering the Hydra command with the correct parameters, press Enter to execute the attack.
- Monitor Progress: Hydra will begin the dictionary attack, attempting each combination of usernames and passwords against the target HTTP authentication. Monitor the terminal output to observe the progress of the attack.
- Capture Successful Logins: If Hydra successfully identifies valid credentials, it will display them in the terminal output, indicating successful authentication.
Conclusion
In conclusion, HTTP authentication is vital for securing web applications by confirming users’ identities before granting access to sensitive data. Throughout this article, we’ve covered its basics, setup procedures, common vulnerabilities, and how attackers exploit them.
We learned how to set up password authentication on Apache servers, discussed common security risks like brute force attacks, and explored how attackers use tools like Hydra, Burp Suite, and Metasploit to exploit these vulnerabilities.
To protect against such threats, it’s essential to implement strong authentication measures, enforce secure password policies, and regularly monitor security systems.
FAQ
Here are some frequently asked questions (FAQ) about HTTP authentication:
What is HTTP authentication?
- HTTP authentication is a method used to control access to web resources by requiring users to provide credentials, such as a username and password, before accessing protected content.
What are the different types of HTTP authentication?
- There are several types of HTTP authentication, including Basic, Digest, and Form-based authentication. Each type has its own mechanism for verifying user identities.
How does Basic authentication work?
- Basic authentication involves sending the username and password in plaintext with each HTTP request. While simple to implement, it is vulnerable to interception and should be used over HTTPS for security.
What is Digest authentication?
- Digest authentication improves upon Basic authentication by hashing passwords before sending them over the network. This adds an extra layer of security compared to Basic authentication.
How can I set up password authentication on my web server?
- Password authentication can be set up on web servers like Apache by configuring authentication directives in the server configuration files or using .htaccess files to control access to specific directories.
What are some common vulnerabilities in HTTP authentication?
- Common vulnerabilities include brute force attacks, credential stuffing, session fixation, and man-in-the-middle attacks. These vulnerabilities can lead to unauthorized access to protected resources if not properly mitigated.
How can I protect against HTTP authentication vulnerabilities?
- To protect against vulnerabilities, it’s essential to enforce strong password policies, implement multi-factor authentication where possible, regularly audit authentication systems, and use HTTPS to encrypt authentication credentials.
What tools do attackers use to exploit HTTP authentication?
- Attackers may use tools like Hydra, Burp Suite, Metasploit, and others to exploit vulnerabilities in HTTP authentication systems. These tools automate the process of guessing usernames and passwords or intercepting and manipulating authentication requests.
How can I learn more about securing HTTP authentication?
- There are many resources available online, including documentation from web server providers, tutorials, and security blogs, that can provide more information on securing HTTP authentication and protecting web applications from attacks. Additionally, online courses and certifications in cybersecurity can offer in-depth knowledge on securing web applications.